Sidor

Showing posts with label sewing. Show all posts

Thursday, January 28, 2016

Decoupage on fabric


I love decoupage. I wish I was a good painter, but I'm not. Decoupage lets me make beautiful decoration without being able to make pretty flowers by hand. Love it!

If you're not familiar with decoupage, it's a technique where you use a glue/varnish to stick the top layer of a paper napkin on a surface. Like on this canvas. The text is my making, but the flowers are decoupage.


I have used decoupage on multiple objects, but now also on fabric. It opens a world full of possibilities! I have made pillow cases for the couch (I made a green painting and the pillows didn't match) and decided to try decoupage when I ran out of green fabric.


I used one motif with stars and one with flowers, the one I used on the canvas. It turned out great! The glue feels a little plastic when it dries, but that's fine.


I tested to use the napkin as it was on one pillow.


Then I cut out the flowers and formed a bouquet on the front of the next pillow...


 ... and on the back I just spread them out.


I also made a new lamp shade for the window. It is a piece of fabric glued with hot glue to the wire frame. I love that I now have a matching canvas, lamp and pillows in this room!

Saturday, August 17, 2013

Something homemade

When I'm invited to any kind of celebration - birthday, wedding, christening.... I always try to come up with a gift I can make myself. Today wad no exception. We celebrated my youngest nephews, the twins. And they seemed to appreciate my gift. A book for kids with recipes and an apron. Homemade, of course. Well, not the books...


This was the first time for me sewing aprons. I used a bought apron in kid size as a template for the body part. Bias binding around all edges, but under the arms I made it wider and as a canal for the ribbon. I let the ribbon around the neck continue through the canals and out on the sides to be tied in the back. This way, if you pull the ends the neck ribbon gets shorter to fit a smaller child. Most of you have probably seen it before.


And a big pocket in front. Used for candy at the party, since the aprons were tried on. And kept on! That warms auntie's heart! ♡

Tuesday, January 8, 2013

Sparkling hat, pattern

Oh my, I really didn't plan to be quiet this long... Time flies, it seems. Well, now that I am here, I thought I would write down a little pattern of mine. It is nothing special, honestly, but this seems to be the best place to keep patterns I might want to use again. I never seem to find the right paper or notebook in my creative mess off-line. :)


This is the latest hat I've made for my sweet girl. A friend of hers had a pink hat with sequins, and she wanted me to buy her one too. But crocheting and knitting people don't like to buy hats, right? We like to make hats. So when we found this sparkling yarn with sequins in our fav yarn shop, the kid got to choose colors and mum got her needles and off we went.


The yarn wasn't great to work with, because of the sequins. It was meant to be knitted with 8 mm needles, and I used 3,5 mm... A bit tight sometimes, and many sequins are hidden inside the hat. But if you use the right size, I bet it is great to work with. Soft and with a luxurious feeling to it. I mostly knitted stripes, but also tried a little zig-zag. It didn't work at all... :) You can't even tell what it is supposed to look like, it just looks blurry. Well, well...


I wanted generous earflaps to keep soft cheeks warm, and she wanted a ballon top. Of course, since the frind's hat has a ball... :) I made braids on the earflaps, to weigh them down. Both the ball and the braids are partly made from a bulkier wool yarn. I decided at an early stage that I would line the hat. The original plan was to knit with two threads, the sequin yarn and this bulky wool. But the sequins and the sparkles got lost in the wool so I had to think again. And so I decided to go with only sparkles and then line. I simply used an old t-shirt for lining.


The lining was easy to make. I put the hat on a piece of paper, folded double in front and back, and drew around it. Cut it out and transferred it to the shirt. Sewed a zig-zag seam all around the two identical parts, and attached the parts with a straight seam over the head.


I actually made a staight seam around the remaining edges too, to make the mounting easier. As I would fold the edges of the t-shirt a little, to hide them inside the hat, there was a high risk that it would all turn out crooked. So I made a straight seam around the edge, right where I was meaning to fold it. This way I could keep a track of where I should be whipping it together with the hat, not folding too much or to little away. One of my brighter moments, if I may say so! ;)


Well then, it's about time I write down the actual pattern now...

I used a yarn called Paljett from Svarta Fåret (www.svartafaret.se). I had two balls of 50 g (=132m), and I didn't even use half of it. I used 3,5 mm circular needles, and my gauge was approx. 17 st and 25 rows for 10 cm. The size I aimed at was to fit an 8 year-old with a big head, she is 56 cm around the head.

I started with the earflaps.

Right earflap:
Cast on 8 st. Start knitting, stockinette. Increase 1 st on each side, every second row until you have 22 st. Increase only on the right side (the side closest to the face) on every second row, 4 times. Now you have 26 st. Cut thread. You can leave it on the needles if you like.

Left earflap:
Like the right earflap, but keep increasing only on the left side when you reach 22 st. Cut thread when you have 26 st.

Neck:
Cast on 20 st, knit the left earflap. Cut thread.

Forehead:
Cast on 24 st, knit the right earflap. Knit the neck and keep knitting in the round. Each round now begins after the right earflap, you could place a marker if you like. Each round now has 96 st. Keep knitting until the work is about 10 cm from neck and forehead. Now, start decreasing.

Decrease:
Dec 1: Decrease every 8th st (= knit 6, knit 2 together). You now have 84 st.
Knit 4 rounds.
Dec 2: Dec every 7th st (=knit 5, knit 2 together). 72 st.
Knit 4 rounds.
Dec 3: Dec every 6th st. 60 st.
Knit 4 rounds.
Dec 4: Dec every 5th st. 48 st.
Knit 4 rounds.
Dec 5: Dec every 4th st. 36 st.
Knit 4 rounds.
Dec 6: Dec every 3rd st. 24 st.
Knit 4 rounds.
Dec 7: Dec every 2nd st. 12 st.
Knit 4 rounds.
Cut yarn, and thread it through the remaining stitches. Fasten all ends.

Cut pieces of yarn and braid them around the lowest part of each earflap. Make the ball. I attached it after the lining, and secured the top of the lining to the hat as I fastened the ball. Finished!

I have no pictures of the knitting process, since I wasn't planning to make any kind of tutorial. As I said, this is mostly for me and my lousy nemory. :) But if you are giving it a try, feel free to ask. There are no stupid questions!

I did not make any kind of ribbing, since I thought the lining would keep the edges from rolling up. It seems to be working. You get a lot of ends to fasten, casting on each part separately as I did. If you know a better way, or a way to cast on nicely from right to left, please tell me!

Monday, November 26, 2012

Slippers

I am up late tonight. Trying to get tired wnough to aleep well, in spite of the ache. There is snow in the air, and it hurts. No use to try to fall asleep then... So sincee I am getting pretty bored from lying on the couch doing nothing useful, I thought I could show you what I have been up to this week.

My daughter reealized that she had no slippers, they were all too small. She didn't seem too  keen on letting me knit her a pair, and not crochwt either. So I thought maybe I could sew her a pair or two. So I did.

The first pair (or really the second pair I made) ismade in felted wool. They used to be a cardigan that actually used to fit me a long time ago. It didn't anymore, so I threw it in the washer and felted it, and kept it for the right project. Since black and grey is not what young girls dream about, I tried to spice them up a bit by stitching them with sparkling silver yarn and adding some sequins. I think I succeeded, since she even agreed tomake them her school slippers. (As you might know,kids in swedish schools do not wear shoes inside, but it does get rather cold and wet on the floors this time of the year.)


The first pair I made was also made from clothes. A fleece sweater my daughter used to wear. And I am happy to say that I only had to use the arms, so I have most of it left. These are a lot softer than the thick, sturdy felt slippers above, but I think they are perfect for lazy days under a blanket on the couch, or after an evening shower before bedtime. 


Both pairs have leather soles, made from a bag of scrap leather I bought on a market a few years ago. The pattern is from marthastewart.com, but I will tell you more once I sit down by the computer for a while. Have some pictures from when I made the first pair.

It is getting seriously late now, so I think I better get to bed now. Hopefully to get a good nights sleep. I hope you will too, once it is your bedtime! :) Good night!

Wednesday, September 12, 2012

I love needlecases

After a period of pain, work, house tending and almost no crafting at all, I'm happy to be back again. I was meaning to share the joy over my new crochet books with you, and also the circles (becoming a bag for my kid) made from patterns in one of the books. But there was either no time or I was simply too tired... Guess you'll see less of me now, when work takes some of my time.

But now, I have something to share. I've spent the last two days organizing my (almost non-existent) needle work. Namely my beloved baskets, containing my ongoing projects.


I have made myself three more needle cases. Oh, how I love making these little things! I love choosing among my felted sheets (bought in a cheap store, no quality to speak of but sooo cheap). I love going through my box with embroidery threads, leftovers from old table cloths and tapestries. 


I start with no plan at all, letting one colour give the other, and one stitch lead the way to the next. It is ever so exiting to see the finished result. And I fall in love with them.


I love filling them up with needles of all sorts from my sewing box.


And I love forcing my family to tell which one is their favorite and why. :) Even though I can't make up my own mind. I never thought I could love a needle case more than I loved my light blue one with lilies of the valley. Now it stands between the purple and the brown. But I think I am even more in love with how different they all are. But enough bragging! ;)


I also love to organize my beautiful baskets. Each one is now supposed to have a pair of scissors, pen and note pad, needle case, measuring tape and a little jar for cut ends. Not to be removed! (Yeah right, that's just a matter of time...)


I have also made project bags. My baskets used to keep a lot of yarn from old, finished or abandoned, projects. All in a mess, entangled in each other. The plan is that I from now on don't have to carry around the entire basket when I feel like switching to another needle work, I just bring the bag to the place where I want to sit. I have placed one basket in strategic places where I usually sit. So hopefully this will be less messy, and I will always have a pair of scissors and a measuring tape at hand. Not all in one place or mysteriously missing...


I have to show you this one. The other bags were made from pillow cases, a piece of a curtain and a shirt sleeve :), but this one is more precious. I found this embroidery sample among my mother-in-laws things. I thought that I could make something of it, and so I did. I just added a back and a little canal on top for the ribbon to go through. Isn't it beautiful?


So now everything is neat and organized. All I need is some inspiration to go on with my actual projects, tucked down in my pretty baskets... Maybe my kids will help me with this. My embroidery got them inspired, so they are planning to do some of their own after school. And what could be more inspiring than to sit down and create together?

Wednesday, August 22, 2012

My blanket-cardigan :)

I have taken some pictures for you today. Not the best ones mankind has ever seen, but at least you get a decent understanding for what I'm trying to show you. I hope! ;) I find it terribly hard to take my own picture.

My blanket-cardigan (cape sounds too... fashionable?) is really one big piece of fabric, somewhat like a blanket in size. I cut it in half, only not all the way through. I stopped a little bit after the middle of it. Then I sat blanket stitching all day...


How to wear it is truly simple. Drape it over your back, with your head in the cut and the cut pieces over your arms.


Like this. Dead simple!


This is probably how I will use mine, just throw it over my shoulders before stepping outside. The fabric is wooly, which is really all I can tell you about it. No, that's not true. I can tell you it's itchy too! :) I bought it cheap in a second-hand shop years ago, and I don't know a lot about different kinds of fabrics. But it doesn't weigh a lot, and I like that. 


If I want to drape it, it's easy to just throw one of the side pieces over the shoulder. And maybe use a pin or a brooch to keep it there.


I already had a few crochet flowers hiding in a corner, so I didn't have to make something new.


Good to have options, right? To go with the mood of the day!


But I think I prefer to have it hang loose, wrapping it around me easily. I love the idea of this "cardigan", since it will fit me just as well if I wear another cardigan (or even a coat) underneath, or just a t-shirt. It won't feel tight anywhere! :) Perfect on a cloudy day like this, in late summer.


Pretty comfy, even if my girl thought it was too itchy to wear. :) But then I get to keep it for myself! I don't mind a little itching. 


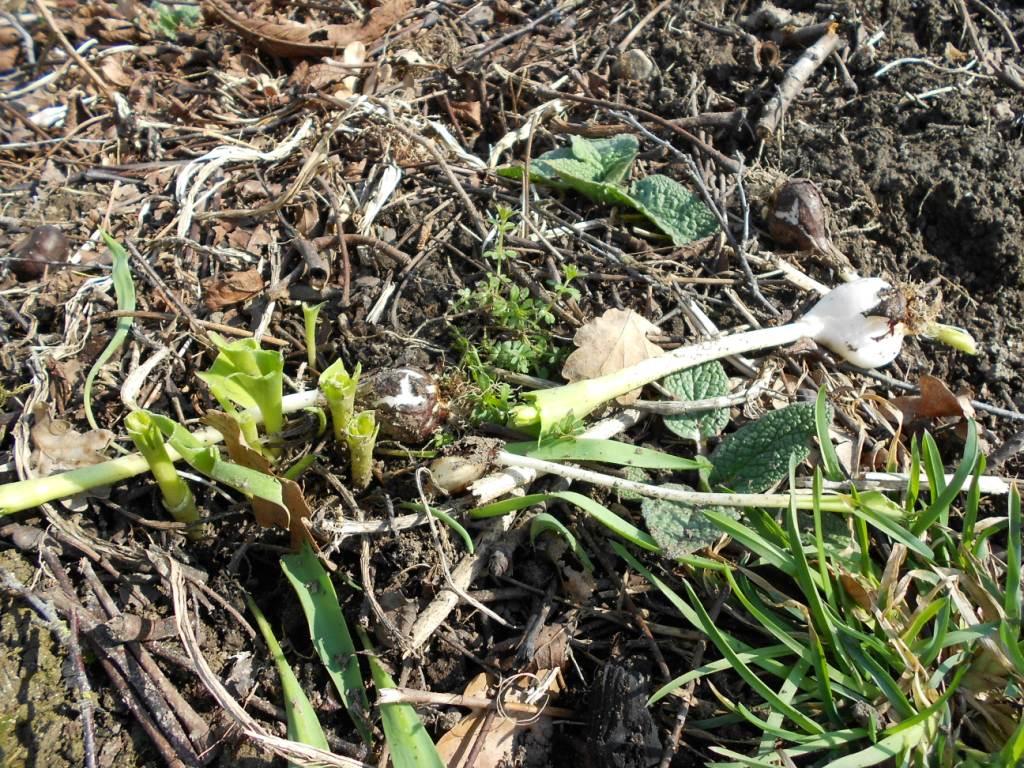
I had a walk around the garden, trying to find a decent background or a good place to put the camera. Didn't find too much of either. But I did find this little one. Did you know you can it them? At least as long as they are firm and white (no yellow inside!). Slice them thin and fry them, and you'll find they taste like pancakes! My daughter doesn't usually eat mushrooms, but she loved this one.


We still have a lot of wild strawberries, big ones. I eat a bunch every day, would hate to see them rot away. Wouldn't eat this one though... Someone else beat me to it!


And finally, a glimpse of the latest project. I have some chunky knitting going on, but as usual I seem to have too little yarn for the project I planned. :( I must be overly optimistic, or why is this happening to me all the time? Hopefully I can work it out somehow, I will keep you posted. 


Tuesday, August 21, 2012

Stitching

Just a quick hi there from me today. Still need to get some kind of routine when it comes to computer time. I am home alone when the kids are in school, but that seems to be my creative time now. I don't want to sit down typing then. And now I blog on the android again, the son is absorbed in some new computer game... :)
Anyway, here's a glimpse of what I've been up to. Blanket stitch! A lot of it. It's not a blanket I've made, rather a cape. Or maybe a blanket-cardigan. :) I'll show you tomorrow!

Friday, April 13, 2012

Much better

I'm quite happy today. I'm stiff and sore, but it's because I did something yesterday. And that kind of pain is a lot easier to bear! I felt a little better yesterday, so I did some sewing. It worked fine, so I ran to get some yarn and a hook...


...and got started on a little shawl in love knots! Yay! I probably should finish some of my projects instead, but my little girl had asked me so kindly if I could make her some more shawls. She has one in purple, but it doesn't go with all her outfits so she thought she needed some in different colors. And I am so happy to be able to work a little bit on this one.


But the thing that really made my day was probably this. My garden, how I love it! It always makes me feel so much better. Just walking around, checking what is new and what is growing. It gives me such a feeling of well-being. 


Soon, really soon, I'll be able to make some nettle soup. I love to, both since it's tasty and healthy, but mostly because my son loves it. And he doesn't like vegetables or anything green, so I'm thrilled that he actually is looking forward to this soup. :)


Ah, I love these little beauties! I wish they would spread out faster. I just love those old gardens that turn all blue in spring, with the lawn filled with them. Lovely!


This isn't that lovely, though. I guess that roe deer came back when I didn't see her and had a good meal. I'm not too upset, since this is actually the first time they've eaten my tulips since we moved here seven years ago. Just hope they don't get at taste for it now... 


Well, what can I say? A little needlework and a stroll in the garden really lifted my spirits. I'm happy. And that gives me strength to keep going a little longer, even though it still hurts a bit. Today is laundry day, but I also hope to be able to plant the pansies that are waiting on the porch. It's hard not to do too much, once I have a better day... But I'll try not to overdo it. :)

Monday, March 12, 2012

Birthday and flowers

It feels like I haven't been in here for ages... It's been a busy week! I usually sit at home every day, but last week I got to see the world for five days in a row! :) No big things though, a few visits at my husbands childhood home, church and stuff like that. But I liked getting out and meet people!

We also had people here yesterday, my family to be specific. They came over to celebrate my husband, who got a little older the other day... I had some plans to knit him a few things for his birthday, but since my hands were hurting last week (but a lot better now), he received a gift still on the needles and a little gift bag that I made. 


I often get compliments for my hand writing when I make cards, but there's really nothing to it. I usually write just as ordinary as anybody else, but for those special occasions I have a book to look in. It contains all kinds of different alphabets, and I simply copy them. Easier than it looks like, I can assure you! But I love the way it turns out most of the time. Best of all, these alphabets look great even if you don't write in even lines!


I've been trying to craft in other ways with my hurting hands, so I made this pimped pot the other day. Just sewed some felt together and glued some felt hearts that I cut out from scraps on it. I hurt a little though, my left hand didn't really want to hold on to anything. Guess I've been holding on to the knitting needles to tightly lately! So I've tried to stay positive, appreciating what I can do.


Today I felt that I had energy enough to start replanting my indoor plants. I started with the geraniums. They moved to clay pots, and I used some old saucers my mum gave me. I love them! Only wish I had more... I am planning to take cuttings from a lot of my plants, and I so wish I could put them all on pretty saucers! Either way, I hope to be able to continue tomorrow. Better not overdo it, as I usually do, and use up all energy in one day. I would regret that! So tomorrow I´ll be replanting... hmmm, perhaps suckulents. But now I better get dinner started!

Tuesday, March 6, 2012

African Flowers-väska

(”AfricanFlower bag-pattern in Swedish.)

Mönstret på min African Flower väska har efterfrågats på svenska, så här kommer det:


Jag använder ett ganska tjockt bomullsgarn för den här väskan, Järbo garns Soft Cotton. Jag använder en 4,5 mm virknål, och blommorna mäter då ungefär 12 cm från sida till sida. Om du behöver mönstret för blommorna på svenska så finnsdet här.

Jag brukar börja med att välja ut en grundfärg för väskan, och tre eller fyra blomfärger. En av blomfärgerna väljs ut för att vara mer dominerande än de andra. Sedan gör jag 12 st hexagoner (sexkanter). Jag väljer att bara göra dem i tre olika varianter, så att jag får fyra blommor av varje färgkombination.


När jag har alla blommor jag behöver, syr jag ihop dem. Två av varje färgvariant i varje rad. Jag tycker om att göra ett symmetriskt mönster och sätta dem på samma plats i raderna. Som A, B, C, A, B, C, och sedan sy ihop det sista C:et och det första A:et för att få en cirkel av hexagoner. Jag använder inte grundfärgen till sömmarna, jag gillar att låta dem vara syliga och använder varsin  blomfärg till varje rad.


När jag syr ihop de två blomraderna, ser jag till att blomma C kommer direkt under blomma A och B, så att blommor med samma färg kommer så långt ifrån varandra som möjligt. Jag använder en tredje blomfärg till sömmen mellan raderna.


När alla hexagoner är ihopsydda till en cylinder, börjar jag med nedre delen av väskan:


Varv 1: Använd den dominerande blomfärgen. 1 fm i varje m, och 1 fm i sömmen mellan blommorna.
Varv 2: Virkas i grundfärgen (grått i mitt fall). 1 fm i varje m.
Varv 3: Nu börjar jag forma en rak kant. Börja högst up på en hexagon med den dominanta blomfärgen, och virka [4 fm, 3 hst, 2 st, 3 st tills, 2 st, 3 hst, 4 fm] och upprepa detta för varje blomma. (Beroende på hur du har sytt ihop hexagonerna, kan du ha ett annat antal maskor än dessa, men ingen fara! Anpassa bara antalet fm eller någon annan maska som du föredrar att ändra.) Den mittersta st i gruppen om 3 bör virkas i den lägsta maskan mellan blommorna.
Varv 4: Det här varvet påbörjar du förmodligen på en annan plats, men det är mycket lättare för mig att beskriva hur du virkar från toppen av hexagonen, precis som förra varvet: [ 5 fm, 3 hst, 3 st, 3 hst, 5 fm]. Upprepa för varje blomma. Nu bör kanten vara ganska rak.
Varv 5: 1 fm i varje m.
Varv 6: I grundfärgen. 1 fm i varje m.
Varv 7: I dominanta blomfärgen. 1 fm i varje m.
Varv 8: I grundfärgen. 1 fm i varje m. Klipp av tråden och fäst änden.

Nu är vi redo att börja med den övre delen av väskan. Den här delen görs exakt som den nedre delen till en början. Jag använder bara ett annat färgmönster:


Varv 1: Dominanta blomfärgen.
Varv 2-5: Grundfärgen.
Varv 6: Dominanta blomfärgen.
Varv 7: Grundfärgen.


Så långt har vi bara upprepat mönstret för den nedre delen. Men nu ska vi börja med den del där vi kan trä in ett snöre att stänga väskan med. Välj en av dina blomfärger, men inte den dominanta.

Varv 8: Valfri blomfärg. 1 fm i varje m.
Varv 9: [2 st, 2 lm, hoppa över 2m]. Upprepa varvet ut.
Varv 10: [1 fm i varje st, 2 fm runt lm-bågen]. Upprepa.
Varv 11: Grundfärg. 1 fm i varje m.
Varv 12: Dominanta blomfärgen. 1 fm i varje m.
Varv 13: Grundfärg. 1 fm i varje m. Klipp av och fäst tråden.

Nu har vi gjort större delen av väskan. Jag tycker om att göra de stora delarna först, så låt oss fortsätta med bottnen:

Använd grundfärgen. Börja med att göra 4 lm, och fäst dem till en ring med sm.
Varv 1: 9 hst runt ringen.
Varv 2: 2 hst i varje m.
Varv 3: 2 hst i samma m, 1 hst. Upprepa.
Varv 4: 2 hst i samma m, 2 hst. Upprepa.
Varv 5: 2 hst i samma m, 3 hst. Upprepa.
Fortsätt att öka i varje varv med ytterligare en maska mellan ökningarna för varje varv, tills du gör sista varvet:
Varv 11: 2 hst i varje m, 9 hst. Upprepa. Klipp av och fäst tråden.


På första väskan jag gjorde, var hela bottnen i grundfärgen. På denna höll mitt garn på att ta slut så jag gjorde ett varv i den dominanta blomfärgen.

Fäst bottnen på den nedre delen av väska med en av blomfärgerna. Jag fick inte exakt lika många maskor runt bottnen som jag fick på den nedre delen, men om du räknar hur många maskor du har på varje del så kan du lista ut hur många maskor du behöver hoppa över när du syr för att få bottnen att sitta snyggt på väskan. Jag ville inte göra bottnen större, eftersom jag inte ville att den skulle hänga ner så mycket under väskan.

Nu behöver vi ett snöre att stänga väskan med. Detta är absolut den lättaste delen av väskan. Välj en blomfärg och gör en lång rad lm. Den bör vara åtminstone dubbelt så lång som väskans bredd, men jag gör min tre gånger så lång eftersom den ”krymper” innan den är färdig, och du vill ha lite längd på den. Sen gör jag helt enkelt sm i varje lm hela vägen tillbaka. Fäst båda ändarna och väv in snöret mellan stolpgrupperna på väskan. Gör en knut i var ända för att snöret inte ska glida igenom hålen. 


Så slutligen axelremmen. Det är en smakfråga antar jag, hur lång du vill ha den. Jag gjorde min ungefär dubbelt så lång som väskan är hög. Kanske 90 cm. Häng den över axeln när du gör den, och känn efter hur lång du vill ha den.

Börja med att göra lm, så långt som du vill ha axelremmen. Använd grundfärgen. Gör en fm i tredje m från nålen, och börja göra fm hela vägen tillbaka.
Varv 1: Gör 1 fm i varje lm på båda sidor, men gör 4 fm i första och sista lm, för att göra en rundad ökning.
Varv 2: 1 fm i varje m på sidorna, men öka i varje ända enligt detta: 2 fm i samma m, 1 fm, 2 fm i samma m, 2 fm i samma m, 1 fm, 2 fm i samma m.
Varv 3: 1 fm i varje m på sidorna, öka i varje ända: 2 fm i samma m, fyra gånger.


För att få en bekvämare axelrem, syr jag ihop sidorna för att få en rundad rem. Jag börjar en bit upp på remmen, och sparar 4-5 cm i varje ände. Använd en av blomfärgerna till sömmen. Om du vill, kan du lägga en tygremsa, ett rep eller något annat emellan för att få en stabilare axelrem. Jag klippte ut en tygremsa i samma längd som handtaget. Jag vek in kanterna och sydde en raksöm (en ganska krokig sådan, men det kommer inte synas!) längs hela den vikta långsidan. Jag lade den på avigsidan av den virkade axelremmen och började sy ihop den runt tyget.


Sy nu fast remmen på väskans sidor. Jag vänder sömmen på axelremmen in mot väskan, och syr runt den rundade änden med den dominanta blomfärgen. Jag syr också med grundfärgen för att se till att det sitter ordentligt fast. Jag lät faktiskt sömmen gå igenom tyget mellan handtaget och väskan. På det viset kommer inte axelremmen att töja ut sig när du fyller väskan, vilket virkade saker brukar göra. Om du låter den blomfärgade sömmen gå igenom enbart den virkade remmen och väskan, så döljer du tyget helt och hållet.


Nu är väskan färdig! Om du vill, kan du sy ett foder till den. Min vän som jag gjorde denna väska till hade bett mig att göra just detta, så då gjorde jag det. Jag är inte bästa kompis med min symaskin, men jag tror att jag gjorde ett godkänt jobb den här gången. Jag lade väska på tyget jag valt och ritade ut storleken. Se till att tyget är dubbelvikt på ena sidan där du lägger väskan. Sen ritar du ut en bit somär lika hög som väskan, men lite bredare (för sömsmån). MEN uteslut den rundade botten från den här biten! Rita utmed kanten av den nedre delen av väskan. Sy ihop sidorna räta mot räta.

Rita sedan en cirkel på tyget för bottnen, en liten bit bredare än bottnen på väskan. Sy fast den på den första delen, räta mot räta. 


Nu har du en tygväska. Behåll den aviga sidan utåt. Vik ner den råa övre kanten så mycket som behövs för att tygpåsen ska passa i den virkade väskan, från bottnen upp till raden av fm precis under snöret. Sy en raksöm runt den vikta kanten.


Då detta är en ganska stor väska, tänkte jag att det kunde vara bra med en väska för mobilen, eller vad vill ha där, och något att hänga nycklarna i. Fickan är bara en rektangel med en söm i övrekanten, och de råa kanterna invikta innan jag sydde fast den på insidan av väskan. Tygbiten som jag använde för att fästa karbinhaken är en liten remsa där jag vek in alla råa kanter och sydde ihop till en liten remsa från rätsidan, vek den dubbel runt haken och sydde fast den. Så enkelt som möjligt!


Sista steget nu, nåla fast tyget i väskan, och sy fast det. Du kan sy för hand om du vill. Jag föredrar egentligen det, men i det här fallet fick jag inte till en rak söm för hand, tröttnade och använde symaskinen… Tadah, väskan är helt färdig!

Detta är en ganska enkel väska att göra, tycker jag. Eftersom jag använder ett tjockt garn går den fort att virka. Jag har gjort liknande väskor med tunnare garn, och vill man få dem lika stora får man göra många fler blommor och det tar mycket längre tid.

Om du ändå vill använda tunnare garn och göra en stor väska, kan du fortfarande använda detta mönster. Öka bara antalet blommor, gör några fler varv på bottnen och på handtaget. Eller gör den enligt detta mönster för att få den mindre.

Om du hittar några fel i mönstret, eller om du har några frågor, låt mig gärna få veta det! Och det vore väldigt roligt att få se din väska, om du gör en.

Lycka till!