Sidor

Tuesday, December 10, 2013

Long time... again

I'm not here too often, am I? I haven't let go of the blog, it's simply easier to use the faster social networks these days. Facebook, Instagram... Don't have the patience or enough words for the blog. But tonight I'm here!

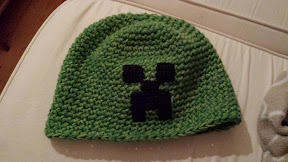
Winter is truly here. Snow and all. The son started using his winter hat, which looked a little too tight. So I convinced him he needed a new one. :) I went to my yarn shop today, and made the hat tonight. I love a quick project!


A dark picture, I know. But do you really expect me to wait until tomorrow?

This hat is a Minecraft hat. If you have young kids you know what I'm saying. It's a computer game. "Everybody" a certain age plays it. The hat is supposed to look like a creeper, a creature from the game. He has a cap with a creeper and he loves it.

The hat is made in crochet with three strands of baby wool in two different greens. With a big hook. 7 mm. I made the face in black and stitched it to the hat. It's a very soft hat, so I might have to make one for me too. Without the creeper... I hope he will enjoy wearing it!

Saturday, November 9, 2013

Re-made

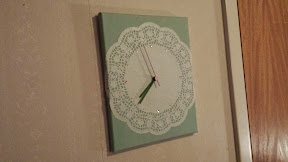
Spent last night in the crafting-room. The clock in our livingroom stopped a while ago. Since I wasn't very happy with the look of it, I decided to give it a re-make. I stripped it and only kept the hands and the mechanism. And then... nothing. :)

So last night I felt the inspiration. And went with it. This is how it turned out.


It's a dark picture, but Sweden in November doesn't get much lighter... :)

My favourite detail? The pink second hand! I painted the canvas with a "sea green" acrylic paint, and the hands with green and pink hobby paint. Rhinestones and a paper doily.

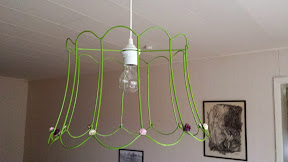
The green colour on the hands was also used on the lamp shade i finished last night too. It used to be an ugly pink velvet shade, but I stripped it and painted the wire green. It stayed like that for a while, but last night I decided to add some paper roses from my scrapbook flower box.


It was hard to catch the lamp with the camera last night, so I took a new shot today.


I like it so much more than the old lamp...


Best of all is that both clock and lamp didn't cost me much at all. The canvas was a cheap one and the lamp shade was bought on a flee market. I love budget crafting!

Thursday, October 31, 2013

Tired of crochet

Or tired from crochet? I don't know. I only know I won't touch a hook again. Today. Maybe tomorrow. ;)

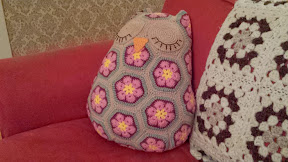
I guess I have been working a little too hard these last few days. My thumbs are hurting. But at least I got something for my trouble. For a while at least. She'll be up for sale too.


She's a sweetheart, don't you think? I was worried she would look all weird, since I never manage to make the flowers flat when I work with a small hook. And I have to, to avoid the stuffing to sneak out. Especially the pentagons are hard. But she flattened out when I filled her up.


Want to make one? Here's the pattern!

Sunday, October 27, 2013

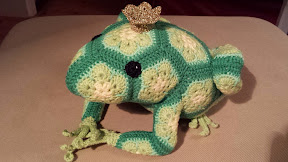
Prince Charming

I am in love! ♡


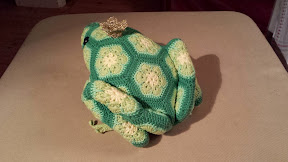
Isn't he gorgeous?! Heidi Bears should get the Nobel Prize in crochet, she's a genious!


I was afraid I might not finish him today since I ran out of yarn, but I worked my magic with what I had and it turned out fine.


I'm glad I had some gold hidden in my yarn treasure too, for his crown. He was pretty fiddly to make at times, but I love him dearly. He will be up for sale on that market, but I'm starting to think I should make him so expensive that noone will buy him! ;)

If you want to make one, here's the pattern.

Friday, October 25, 2013

Me, a crochet teacher?

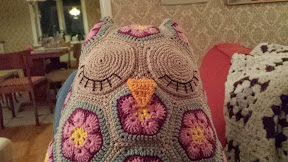
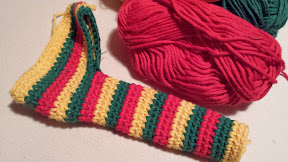
Not really, but today I had the joy to knvite a friend into the World of Crochet. She's been interested for a while, and always send me pictures of cool crochet stuff she has spotted on the web. She is also the reason I found the pattern for the african flower pony. And today she popped in. I got started on a new piece of crochet and showed her how to. She seemed to get it so I threw her a hook and some yarn, and a few hours later she had made this.


I'm impressed! She really got the hang of it and she loved it too. And she was fast too, I am making the same thing and I didn't get so much further.


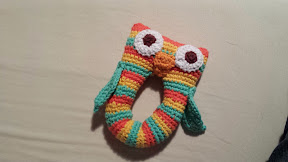
Do you want to know what we are making? Stripey owl rattles! I have made one allready.


Cutest pattern! And easy to make too.

Do you want to know what else I'm working on? Okay, I have made this (so far) leg-less, blind guy.


I hope to finish him tomorrow. Another pattern from Heidi Bears. I saved a week from my summer vacation, so I will be at home this entire week as the kids are free from school. Lots of time to crochet. Yay! :)

Sunday, October 13, 2013

My flower pony

Hi there! Just a small post, have to show you the pony I just finished. Pattern by Heidi Bears, "Fatty Lumbkin the brave African Flower Pony" found here on Ravelry.


Try it! It's a brilliant pattern! This beauty will follow me to a handicraft market a bit before Christmas and hopefully be sold. Yes, you are allowed to sell objects made from her patterns, as long as you make them yourself.

Sunday, September 29, 2013

Love knots again

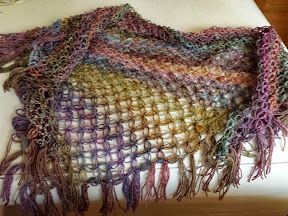
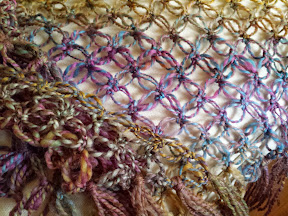
Maybe I can look into the future. Or rather, I know myself too well. I finished this beauty today.


A shawl, just like I predicted a long time ago. I get bored easily if I make the same thing over and over again (at least when it comes to crochet), I want to make something new! But I never get tired of making shawls in love knots. Maybe because different yarns make so very different shawls?


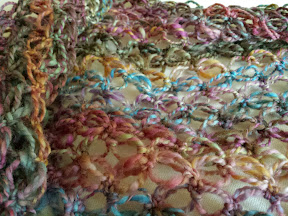
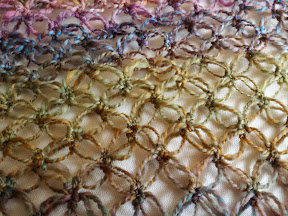
I love how the yarn get to show every beautiful detail in this stitch. Every colour shift...


Knitting or a different crochet stitch would blurr the colours, make it duller. Now, I can admire every pretty inch of it!


I won this yarn on a blog. Lucky me! Now, I will probably put it out for sale. I've booked a table, you see, at a handicraft market before Christmas. It's going to be so much fun, but I have to fill my table with beautiful things. (But I hope nobody will buy this one, so I can keep it! ;))

Saturday, September 28, 2013

Granny square pillow

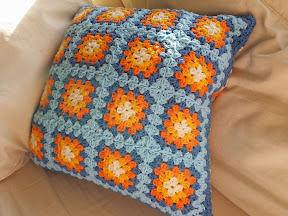
Made something a week ago that I wanted to show you. I haven't been making a lot of things in regular granny squares, but I'm really in love eith them now. Thought I needed some colout in my new white sofa, so this is the result.


Since I like both sides equally, it doesn't really have a front and a back. It simply has two sides. :)


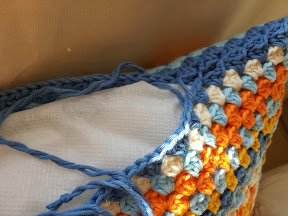
I have found it hard to close a pillow case neatly and still be able to take it off for a wash every now and then. So I tried something new this time, that worked perfectly. I joined the two sides with join-as-you-go technique (I hate sewing things together!) and saved an opening on one side. I then tied a piece of yarn in each end of the opening, twisted the strands and an knot in the end. Then I weaved the yarn through the holes in the ends until they met in the middlle.


Tied a knot, but I didn't want to leave them hanging on the outside like this.


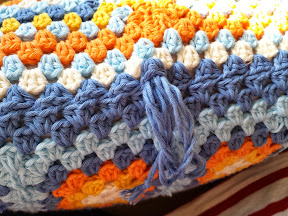
So i grabbed my hook and pulled the strands inside the pillow case. Perfect!


Do you have the perfect way to close a pillow case, without buttons? Feel free to share!

Saturday, August 17, 2013

Something homemade

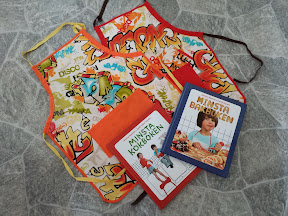
When I'm invited to any kind of celebration - birthday, wedding, christening.... I always try to come up with a gift I can make myself. Today wad no exception. We celebrated my youngest nephews, the twins. And they seemed to appreciate my gift. A book for kids with recipes and an apron. Homemade, of course. Well, not the books...


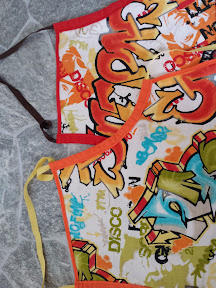
This was the first time for me sewing aprons. I used a bought apron in kid size as a template for the body part. Bias binding around all edges, but under the arms I made it wider and as a canal for the ribbon. I let the ribbon around the neck continue through the canals and out on the sides to be tied in the back. This way, if you pull the ends the neck ribbon gets shorter to fit a smaller child. Most of you have probably seen it before.


And a big pocket in front. Used for candy at the party, since the aprons were tried on. And kept on! That warms auntie's heart! ♡

Thursday, August 8, 2013

African Flower Tasche

Now I am very happy to present to you the African Flower bag pattern in German, thanks to Sabine Raster who made this translation for her Ravelry KAL. She was kind enough to let me use it on the blog for anyone to use. Vielen Dank, Sabine!

(The pattern is also available in English and Swedish)


Abkürzungen:
M = Masche
Lm = Luftmasche
Km = Kettmasche
fe M = feste Masche
Stb = Stäbchen
hStb = halbes Stäbchen

Ich habe bewusst nicht beschrieben, welche Runde in welcher Farbe zu häkeln ist, das kann jeder nach eigener Kreativität (oder nach dem Foto) machen.

Du hast also 12 Blüten gehäkelt. Von denen werden nun jeweils 6 zu einem Ring zusammengenäht (wahlweise auch gehäkelt) und diese beiden Ringe dann übereinander zusammengenäht.

An der unteren Seite des so entstandenen Zylinders arbeitest Du nun wie folgt weiter: (Hinweis: Jede Runde wird mit einer Km geschlossen, um „Treppen“ zwischen den einzelnen Runden zu vermeiden. Beim Übergang auf die nächste Runde wird vor fe M 1 Lm und bei Stb 3 Lm als Ersatz für die erste M gehäkelt.) Neue Farben grundsätzlich mit einer Km ansetzen.
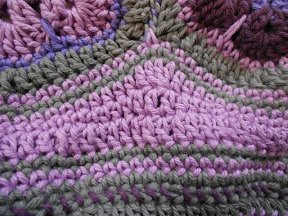

Runde 1: Die gewünschte Farbe mit einer Km anschlingen; nun in jede Masche dieser Unterkante sowie in die Naht zwischen jeweils 2 Blüten 1 fe M häkeln

Runde 2: 1 fe M in jede M der Vorrunde

Runde 3: Nun wird eine gerade Kante gearbeitet:

An der Spitze eines Hexagons (also, an der höchsten Stelle eines Blütenblattes)
anfangen und wie folgt häkeln:

4 fe M, 3 hStb, 2 Stb, 3 Stb zus. abmaschen, 2 Stb, 3 hStb, 4 fe M Diese Folge auf jeder Blüte wiederholen.

Je nachdem, wie Du die Hexagons zusammengenäht hast, hast Du evt. eine abweichende Zahl an M. Aber keine Sorge! Gleiche einfach die Anzahl der fe M oder jede andere M, die Du möchtest, entsprechend an!

Das mittlere der 3 zus abgemaschten Stb sollte allerdings in der niedrigsten M zwischen den Blüten sein.

Runde 4: Wieder an der Spitze einer Blüte beginnen. 5 fe M, 3 hStb, 3 Stb, 3 hStb, 5 fe M Diese Folge auf jeder Blüte wiederholen.

Die Kante sollte jetzt ziemlich gerade sein!

Runde 5: 1 Stb in jede M der Vorrunde

Runde 6: 1 fe M in jede M der Vorrunde

Runde 7: 1 fe M in jede M der Vorrunde

Runde 8: 1 fe M in jede M der Vorrunde

Faden abschneiden, durch die letzte M ziehen und vernähen.

Jetzt zur oberen Kante:
Diese genauso arbeiten, wie die untere, aber nur bis Runde 8!!
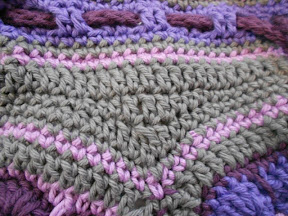

Runde 9: 2 Stb, 2 Lm, 2 M überspringen – diese Folge die ganze Runde lang wiederholen
(so entstehen die Löcher, durch die Du später die Kordel ziehst.)

Runde 10: 1 fe M in jedes Stb der Vorrunde, 2 fe M über die beiden Lm der Vorrunde –
diese Folge die ganze Runde lang wiederholen

Runde 11: 1 fe M in jede M der Vorrunde

Runde 12: 1 fe M in jede M der Vorrunde

Runde 13: 1 fe M in jede M der Vorrunde

Faden abschneiden, durch die letzte M ziehen und vernähen.

Jetzt arbeitest Du den Boden des Beutels!


4 Lm anschlagen und mit einer Km zur Runde schließen.

Runde 1: 9 Stb in den Lm-Ring

Runde 2: 2 Stb in jede M der Vorrunde

Runde 3: 2 Stb in 1 Stb der Vorrunde, 1 Stb – diese Folge die ganze Runde lang wiederholen
(jede 2. M wird somit verdoppelt)

Runde 4: 2 Stb in 1 Stb der Vorrunde, 2 Stb – diese Folge die ganze Runde lang wiederholen
(jede 3. M wird somit verdoppelt)

Runde 5: 2 Stb in 1 Stb der Vorrunde, 3 Stb – diese Folge die ganze Runde lang wiederholen
(jede 4. M wird somit verdoppelt)

Runde 6: 2 Stb in 1 Stb der Vorrunde, 4 Stb – diese Folge die ganze Runde lang wiederholen
(jede 5. M wird somit verdoppelt)

Runde 7: 2 Stb in 1 Stb der Vorrunde, 5 Stb – diese Folge die ganze Runde lang wiederholen
(jede 6. M wird somit verdoppelt)

Runde 8: 2 Stb in 1 Stb der Vorrunde, 6 Stb – diese Folge die ganze Runde lang wiederholen
(jede 7. M wird somit verdoppelt)

Runde 9: 2 Stb in 1 Stb der Vorrunde, 7 Stb – diese Folge die ganze Runde lang wiederholen
(jede 8. M wird somit verdoppelt)

Runde 10: 2 Stb in 1 Stb der Vorrunde, 8 Stb – diese Folge die ganze Runde lang wiederholen
(jede 9. M wird somit verdoppelt)

Runde 11: 2 Stb in 1 Stb der Vorrunde, 9 Stb – diese Folge die ganze Runde lang wiederholen
(jede 10. M wird somit verdoppelt)

Der Boden ist nun fertig und Du nähst ihn (oder häkelst ihn wahlweise) an den unteren Rand des Beutels.

Eine ausreichend lange Lm-Kette (evt. mit doppeltem Garn) häkeln und durch die Löcher am oberen Rand ziehen.
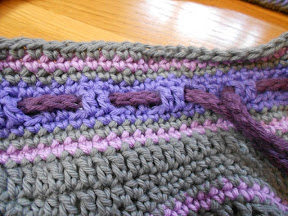

Wenn Du magst, kannst Du nun noch einen Henkel arbeiten, und zwar wie folgt:

Eine Lm-Kette häkeln, die so lange ist, wie der Henkel am Schluß werden soll. Nun fängst Du in der 3 Lm von der Nadel an und häkelst 1 fe M in jede Lm, und zwar auf beiden Seiten der Lm- Kette. In die jeweils äußerste Lm häkelst Du allerdings 4 fe M (damit Du um die Runde kommst).

Runde 2: wieder in jede fe M der Vorrunde eine fe M häkeln und um die beiden Enden 2 fe M in eine fe M, 1 fe M, und wieder 2 fe M in die nächste fe M. Noch einmal wiederholen, dann bist Du auf der anderen Seite.

Runde 3: wie Runde 2, aber für die Rundungen an den beiden Enden in jeweils 4 fe M je 2 fe M arbeiten

Faden abschneiden, durch die letzte M ziehen und vernähen oder gleich zum Zusammennähen verwenden.

Das ganze nun zu einem Schlauch an den Längskanten zusammennähen.

Um den Henkel stabiler zu machen, kann man eine Kordel oder entsprechenden Stoff einlegen und dann erst zusammennähen.


Den Henkel dann an der Oberkante annähen.
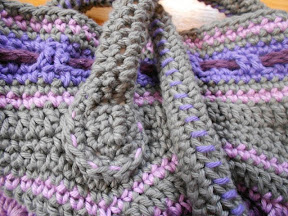

Dreh die Naht nach unten und nähe um die abgerundete Kante. Nähe mit der Grundfarbe noch einmal darüber, damit der Henkel auch wirklich fest sitzt und sich nicht dehnt, wenn Du den Beutel befüllst.


Wenn Du magst, kannst Du nun noch einen Innenbeutel (Futter) nähen.

Leg den Futterstoff doppellagig auf die Arbeitsfläche und den Häkelbeutel längs an den Stoffbruch. Nun zeichnest Du die Höhe (von unterhalb des Kordeldurchzugs bis zum Beginn des Bodens) zuzüglich 1 cm Nahtzugabe nach. Schneide den Futterstoff zu und nähe ihn an der kurzen Seite rechts auf rechts zusammen, so daß ein Schlauch entsteht.

Dann zeichnest Du einen Kreis in der Größe des Bodens auf den Futterstoff, ebenfalls mit 1 cm Nahtzugabe. Diesen Boden schneidest Du aus und nähst ihn an einer Seite des Schlauches rechts auf rechts an.

Nun hast Du einen Stoffbeutel. Dreh nun die linke Seite nach außen. Falte die obere Kante nach hinten und zwar so weit, daß der Innenbeutel bis knapp unterhalb des Kordeldurchzugs reicht und säume diese Kante mit einer geraden Naht.


Jetzt hast Du schon eine schöne große Tasche. Aber wäre sie nicht noch schöner, wenn noch eine kleine Tasche für's Handy oder Zubehör sowie ein Karabiner für den Schlüsselbund drin wäre?

Diese kleine Täschchen ist ein einfaches Rechteck in gewünschter Größe mit einem Saum oben und geraden Kanten, die knapp nach hinten gefaltet werden, bevor Du sie in den Innenbeutel nähst.
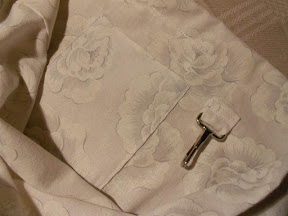

Das Stück Stoff für den Haken ist ein Streifen, den Du längs rechts auf rechts faltest (die Größe entsprechend dem verwendeten Haken) und an der Längsseite sowie einer kurzen Seite zusammennähst, dann die rechte Seite nach außen wendest und auf die gewünschte Länge abschneidest. Nun durch den Haken ziehen und ebenfalls in den Innenbeutel nähen.

ACHTUNG: Es empfiehlt sich, diese Kleinteile anzunähen, bevor der Stoff zum Schlauch geschlossen wird. Das ist einfacher!!

Als letzten Arbeitsschritt steckst Du jetzt den Innenbeutel unterhalb des Kordeldurchzugs fest und nähst ihn mit einer elastischen Naht (oder per Hand) an.


Tadaaaaaah! :))

Wenn Du einen größen Beutel mit dünnerem Garn machen möchtest, kannst Du ebenfalls diese Anleitung verwenden. Erhöhe einfach die Anzahl der Blumen und mach einfach mehr Runden an den Boden und evt. auch an den Henkel.

Und natürlich, wenn Du irgendeinen Fehler findest, oder Fragen hast, bitte lass es mich wissen.

Und: ich würde mich freuen, Deinen fertigen Beutel zu sehen!

Viel Erfolg! ♥

Deutsche Übersetzung von Sabine Raster
Jewelry industry (or not)

From time to time, I play along with my beads. It has been more fun this summer, since my mother (and daughter) has been playing with me. :)

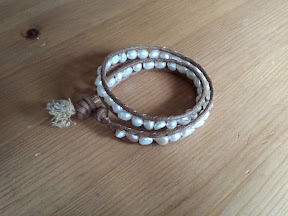
My mother bought a bracelet kit in a craft store, and I used the same technique for two bracelets. One in blue glass and waxed cotton cord.


And the second with freshwater pearls.


I am making a third one with tiny glass beads that I can wrap three times around my wrist. Takes forever, even for my skinny little arms.

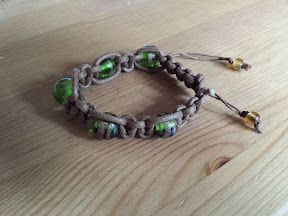
I have a thing for green (and blue) (and pink) right now, so I also made this in macrame.


Oh, and I love all these glass hearts! A necklace is this.


And finally - yes! It worked!


I have made two so far but believe me, I will make more! I am so happy that I tried this.


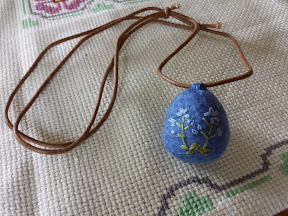
Many more! I love felting and I love small embroideries made on free hand. So this is the perfect thing for me! So happy I tried it.

Extreme lamp make-over

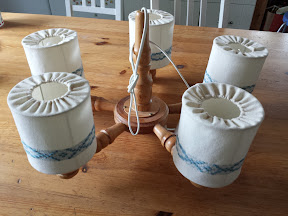
Being the second child often means you inherit things. Everything is bought new for the first child, and the younger gets what is already in the family but nobody uses. So with my daughter. Or at least, so with the lamp in my daughter's room. An old thing with Garfield (the cat) from the time before marriage even. But not anymore!

I went on a hunt in our local secondhand shop, and I found this beauty.


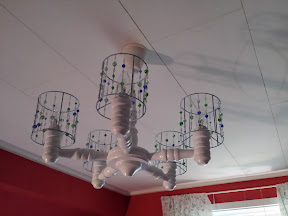
Well, I saw some potential there. Proud that I remembered the before-picture by the way. Usually I'm to eager to get started. I went through our paint tins and found some white in the bottom of one. Great! But I really hate paint that has to dry 16 hours before you can add the second layer. 15 minutes is more my cup of tea. At least that gave me some time to work with the shades. Dug around in my boxes and found glass beads and some pale blue paint. This is how it ended up.


Strings of beads and a pretty bulb along with a little paint. That's it!


The new owner seems to like it. But we have to change the bulbs, they light up the room so much you need sun glasses in there! B-)

Now, run off and get yourself a lamp to remake! It's so much fun!

Friday, August 2, 2013

Outdoor crochet

The summer is amazing here, and I spend most of my time outdoors. My knee has been bad for a while, so I have been seated in the hammock or in a chair in the shadow. Today I finished a cover for this stool.


It belonged to my husbands parents, but when his father moved it became ours. I have painted it (finally, got started last summer) and now I have made this giant granny square rectangle. Thought a little yarn and color was needed.


I am thinking about making a second cover to use when this one is in the laundry. It is stationed in the kitchen, and I don't think it will be spotless for long... But for now I'm content with this one. I like change, making the same thing over and over again can really bore me. :) Probably not a lot of crochet tomorrow though, since we expect a sunny day and plan to visit a lake. Yay!

Tuesday, July 16, 2013

Needle binding

I have found a new hobby today. Not that I needed one... :) But I have been eager to try needle binding lately (nålbindning in Swedish) and thanks to my darling husband, today I could!


Look what he made me today! Wooden needles, and some buttons too. All made from branches from our garden. How cool is that?


This is me needle binding. I am making a small bag. My husband just had the great idea that I could use the lilac-tree buttons on it. Yay!


A close up, so you can see the structure. You kind of tie the yarn into whatever you are making. I use wool, since you have to use only a piece of the yarn and not work with an entire ball. With wool you can felt the ends together when you take a new piece. With non-felting yarn you would have to make knots. Google it if you want to know more, or ask me. But remember that I am only a beginner! :)